From experience, we have needed to debug GET and POST request during the debugging process of our app development. After performing rigorous unit testing and debugging on a library behind TTUStudent, we began using the library in the actual app on real devices and emulators, and noticed that many of the requests over SSL/TLS weren't completed. After struggling with Fiddler for some time, it was clear that there was a configuration problem.
Needless to say, it was difficult to find any tutorial online that would explain how to quickly set up Fiddler to intercept these requests to see if any parameters were being issued incorrectly. In response to this, hopefully this tutorial will shed some light on how to get this done so you can get going with your mobile app development.
Prerequisites:
Android Studio (version shouldn't matter).
An emulator that has already been created. In this tutorial I will be using Nexus 6 API Level 23 with Intel HAXM enabled (x86_64 image). This tutorial might not work with pre-Marshmallow devices.
Fiddler 4 installed already.
Fairly good knowledge of the Android system and Fiddler.
Tutorial:
-
First things first, open Fiddler.
Go to Tools->Telerik Fiddler Options...
Select the "HTTPS" tab and ensure that "Capture HTTPS CONNECTs" and "Decrypt HTTPS traffic" are checked.
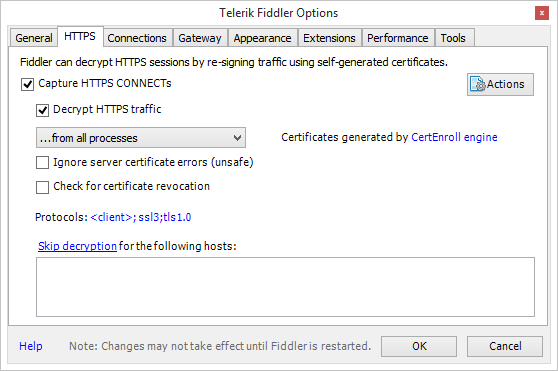
You can have the Fiddler root certificate trusted on your development system, but it shouldn't be required.
Next navigate to the "Connections" tab, and check "Allow remote computers to connect".
The text field "Fiddler listens on port" should say 8888, if not, make sure that's the port you use in future steps.
Everything should look like this:
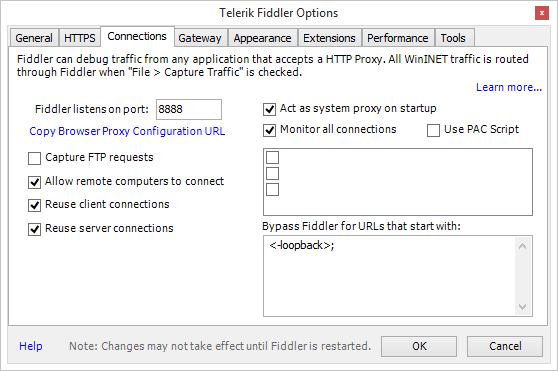
That's all the configuration Fiddler should need. Just make sure that File->Capture Traffic is checked.
-
Next launch your virtual device from Android Studio, command line, or AVD Manager. You don't need any special parameters. I am using the default:
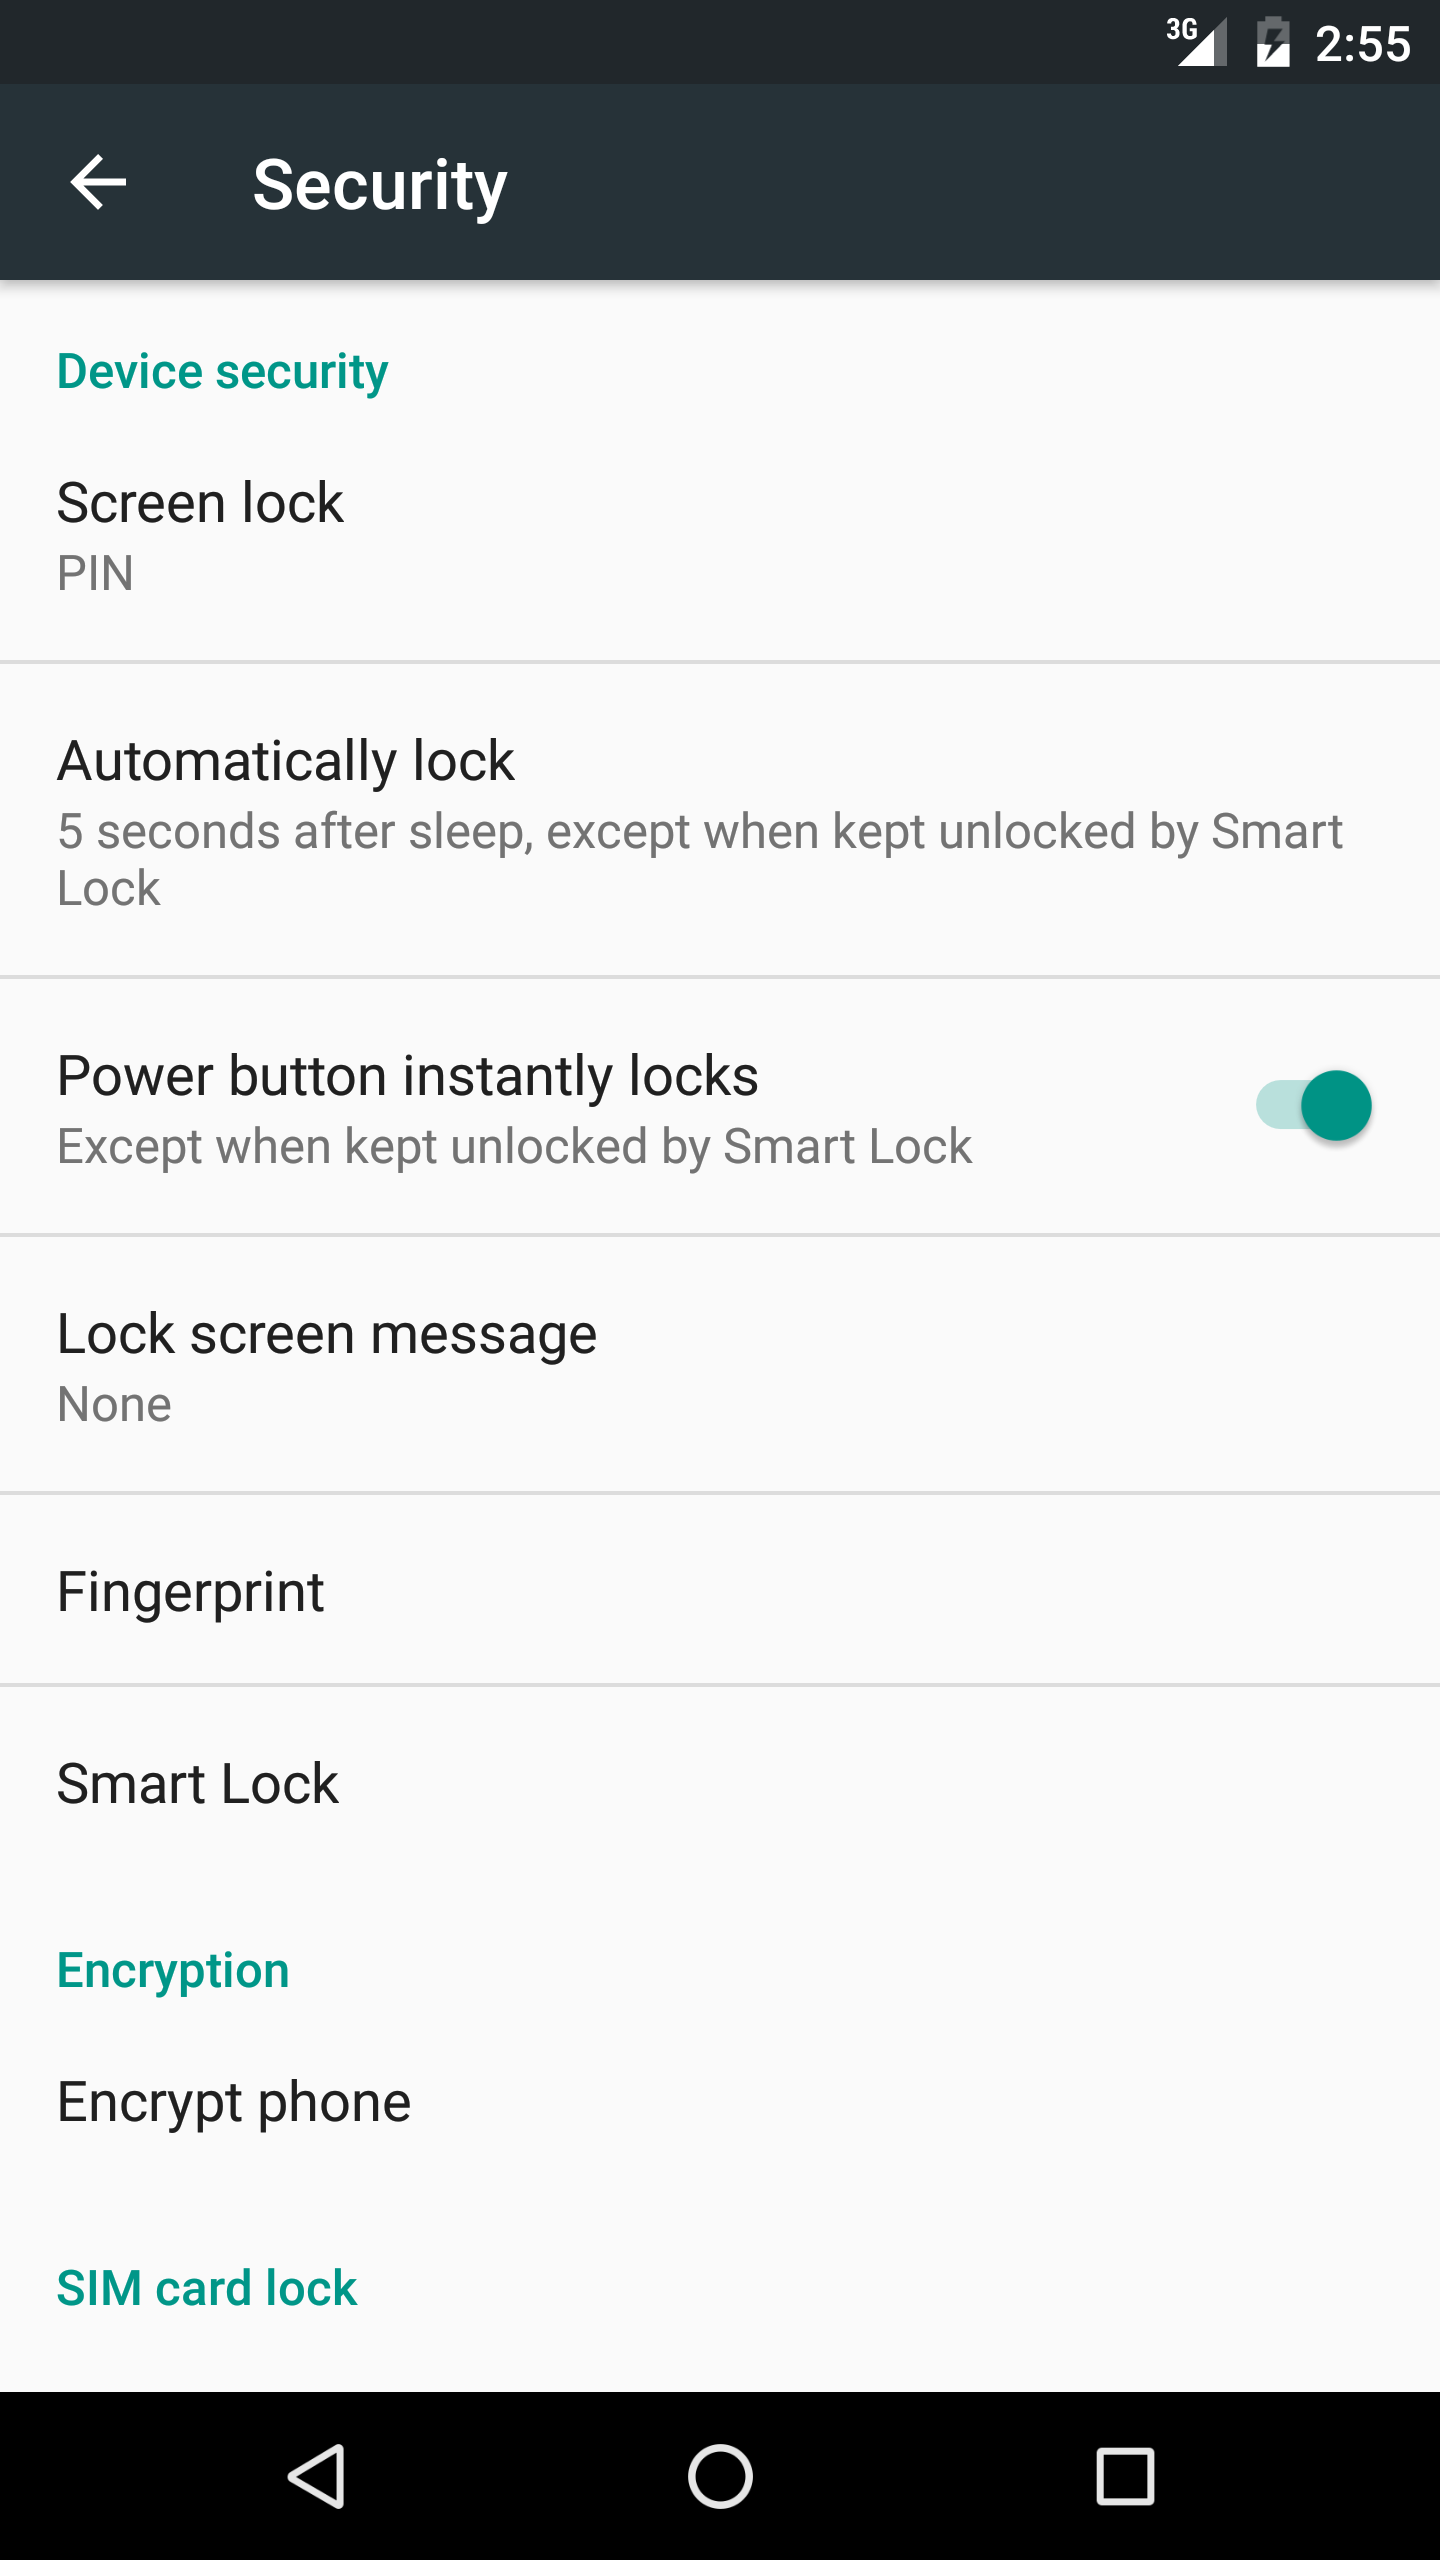
-netdelay none -netspeed full -avd Nexus_6_API_23.Once it is ready, open up Settings->Security->Screen lock. Unfortunately, you need to set up a pin password (it must be a PIN password). I recommend "1234". If you have one already set, skip this step.
You need to enter it everytime the emulator is loaded up. The reason this is needed is because Android won't allow you to install certificates if the device is not secured.
-
On the host system, find the local IP address for the primary computer's connection. I did this by going to
ipconfig /allin a console. However, this can also be done by hovering over the "Online" text on the Fiddler menu bar: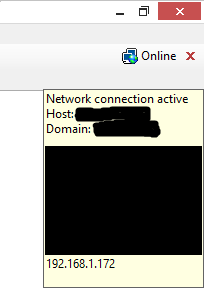
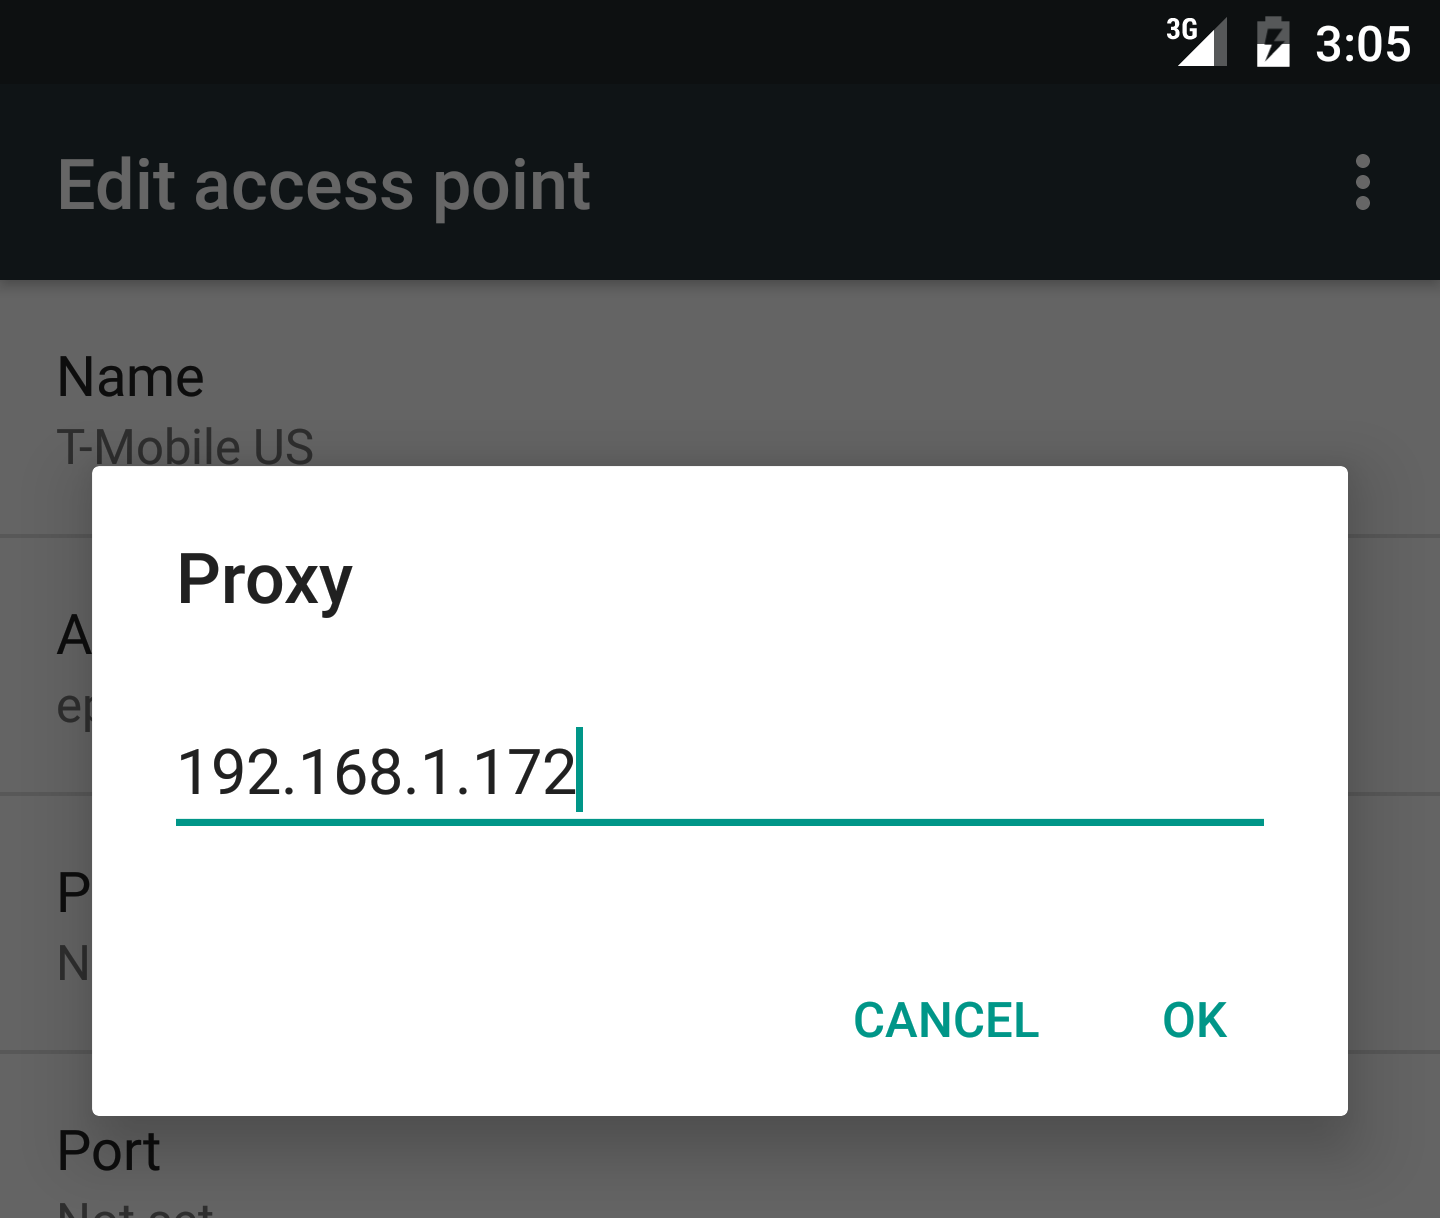
In this case, my local IP address is 192.168.1.172. Your local IP address typically starts with
192.*,172.*, or10.*.Note: if your local IP address changes, you will need to change it by following the next step again. Example: if you have a laptop and move it to another WiFi network, your IP address will most likely change.
-
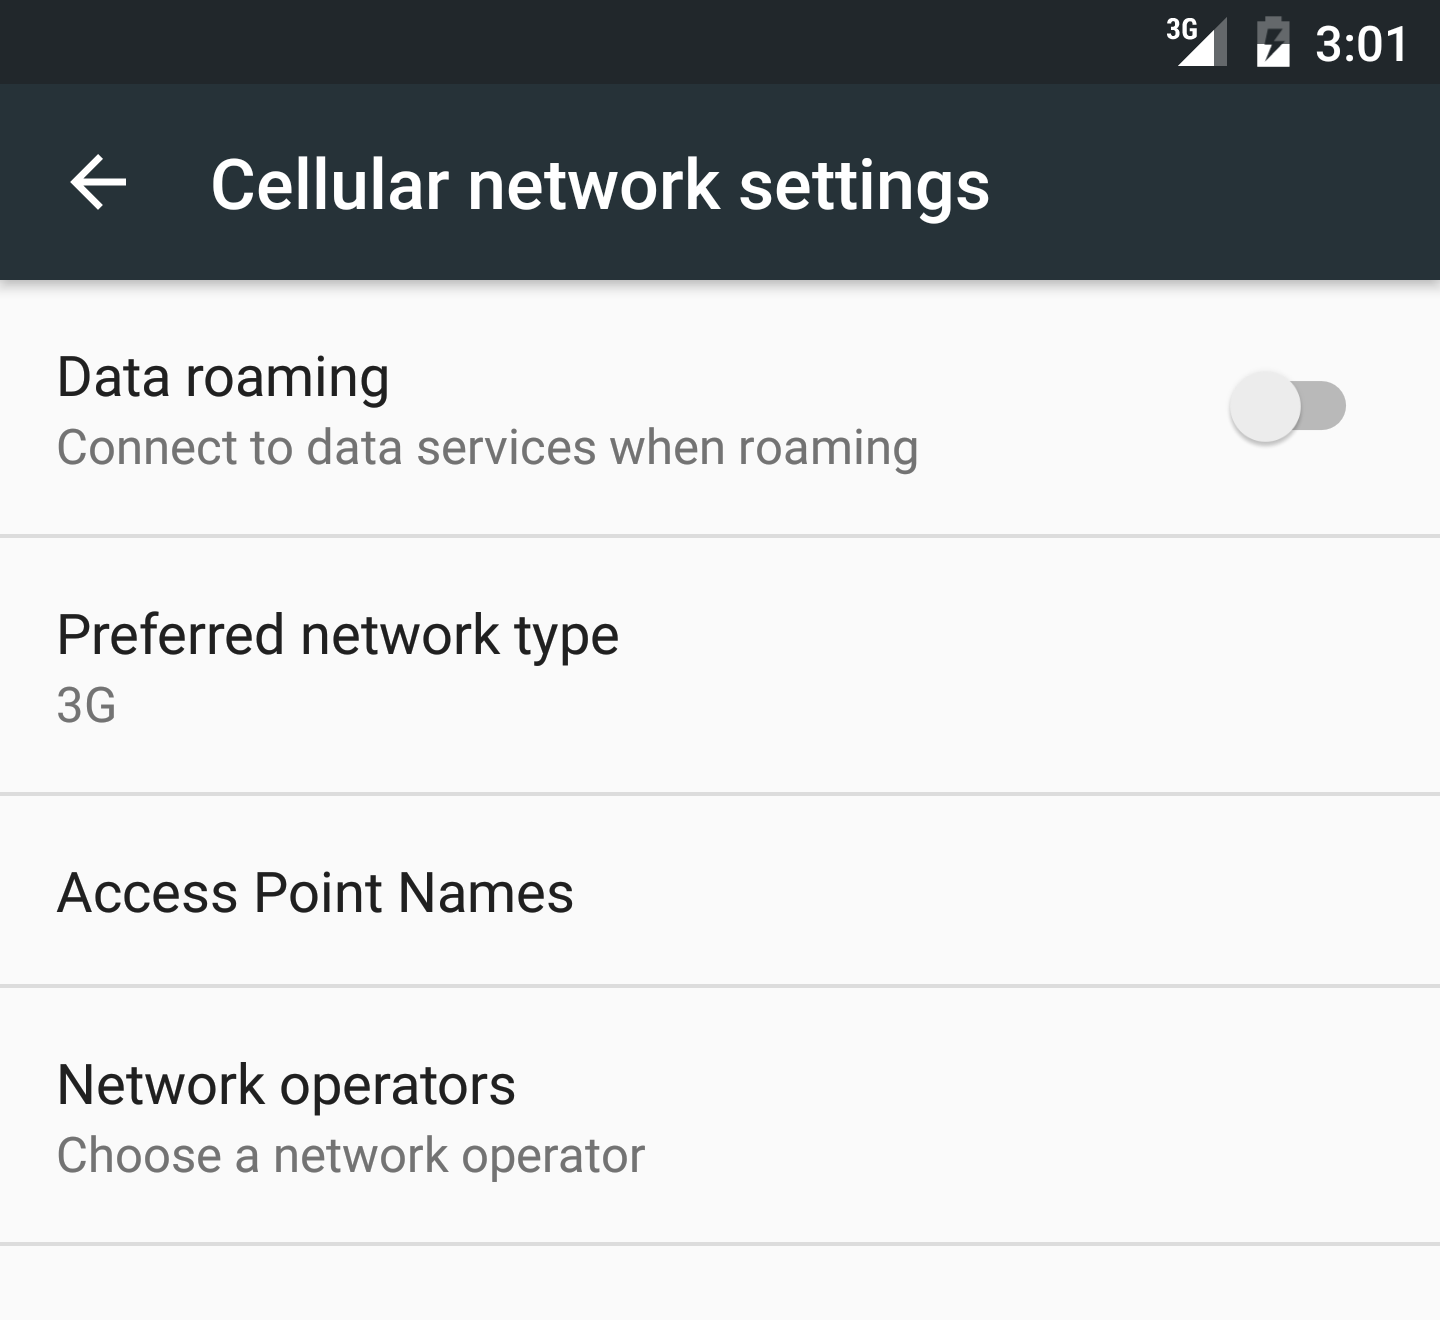
Now back on the device, go back to the main Settings Activity, and tap/click "More" under "Wireless & networks".
Then tap "Cellular networks", then "Access Point Names".
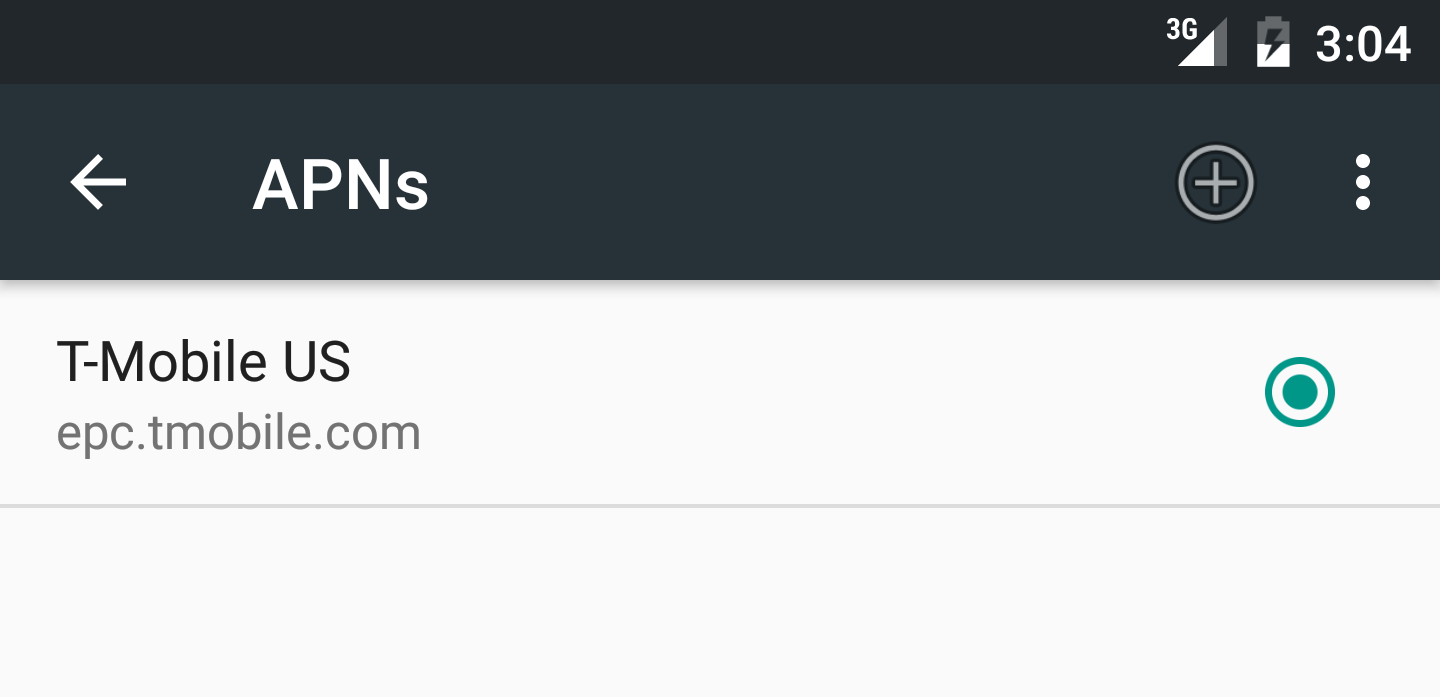
On the APNs screen there should be one entry (T-Mobile US in my case). Tap on the entry.
Then tap/click on "Proxy". Enter just your local IP address here. Tap/click "OK".
Next tap/click on "Port". Enter
8888, then tap/click "OK".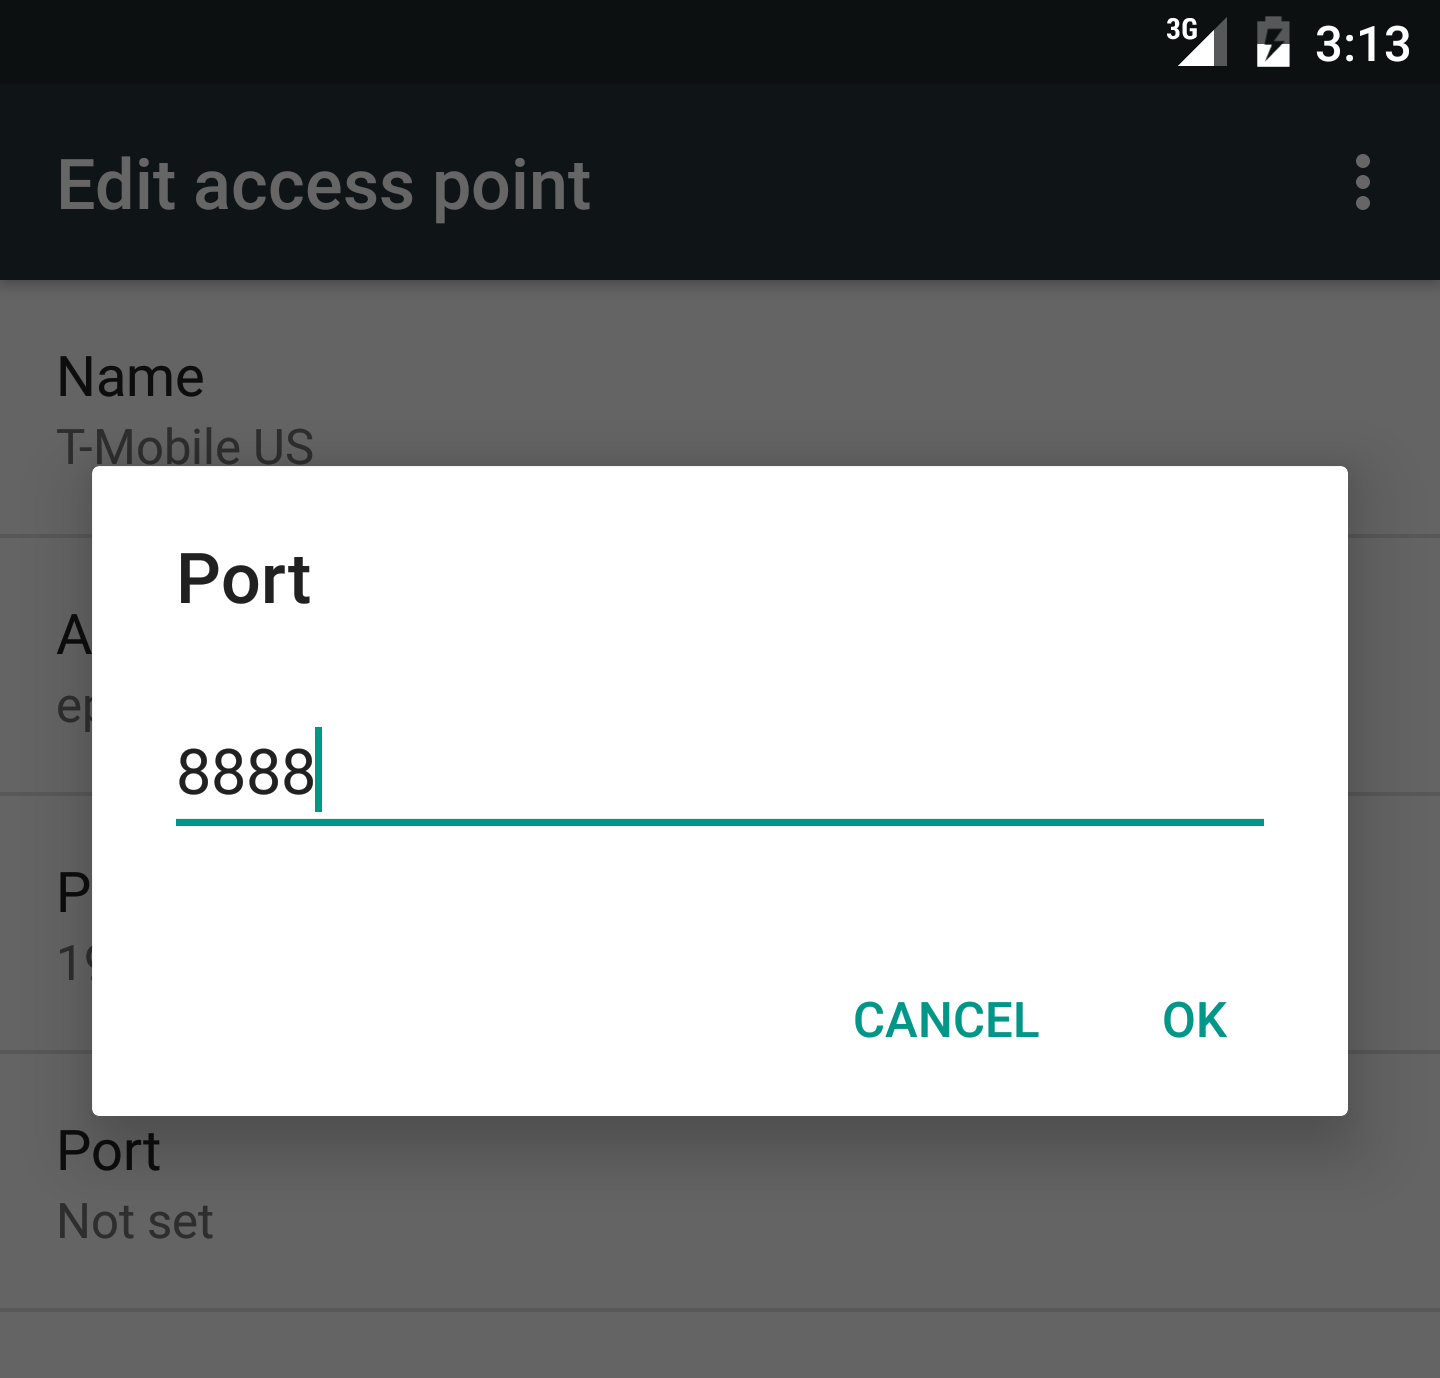
Click the menu expander on the top right portion of the screen, and press "Save". This is very important.

-
Press the home button, then slide the notification area down, and tap/click on "Airplane Mode" to turn on Airplane mode.
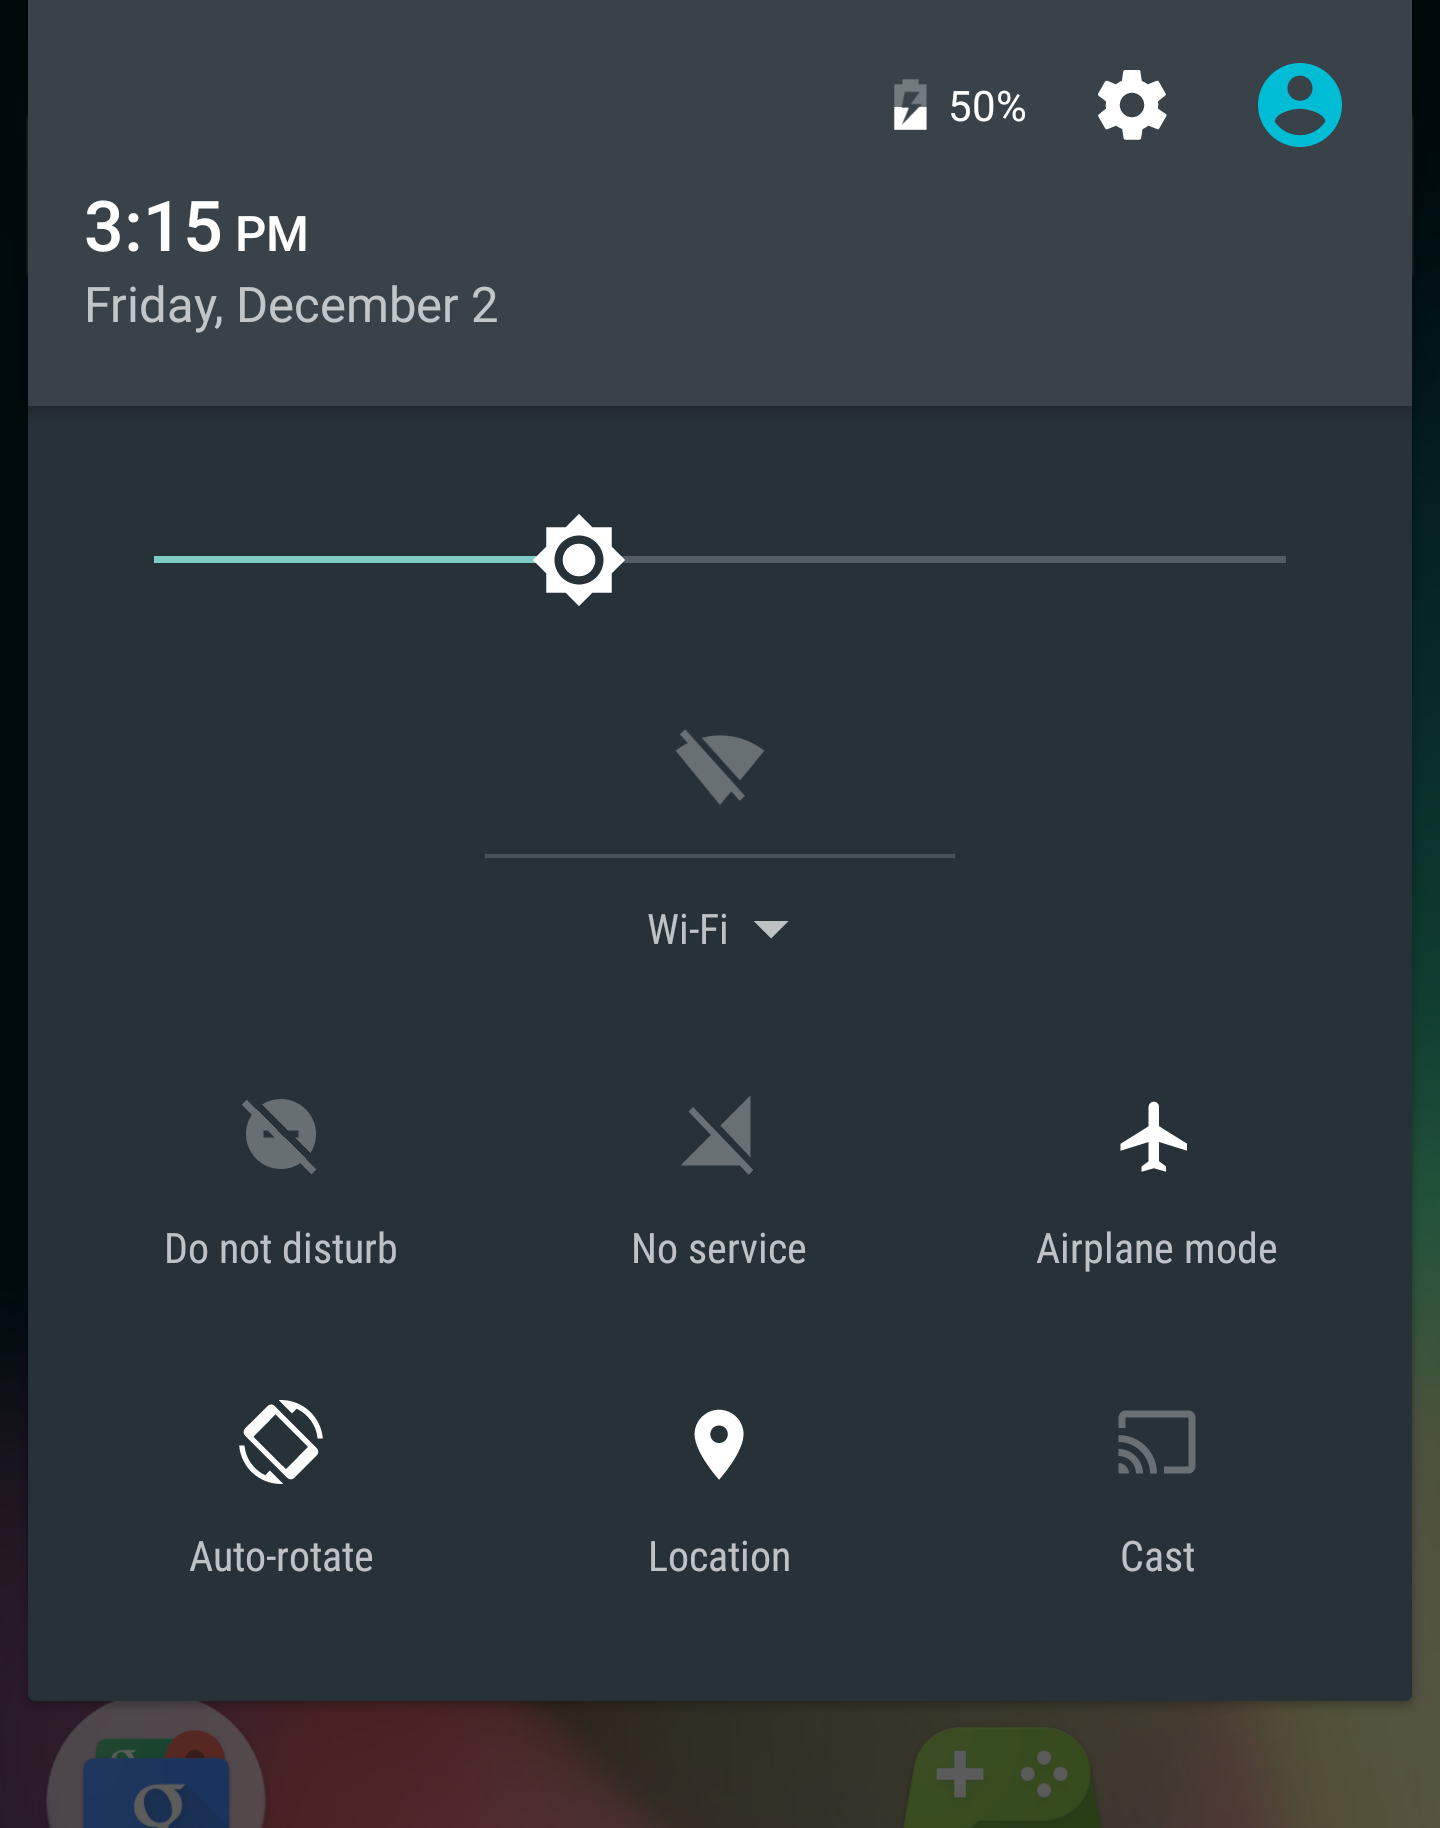
Wait a few seconds, then tap/click it again to turn airplane mode off.
-
At this point, Fiddler should start logging data, however the following steps will remove the certificate problems for SSL/TLS.
Open up the device's web browser and go to the site:
http://ipv4.fiddler:8888/.On the page, tap/click the link that says "FiddlerRoot certificate". Your device should automatically pull up a dialog similar to below:
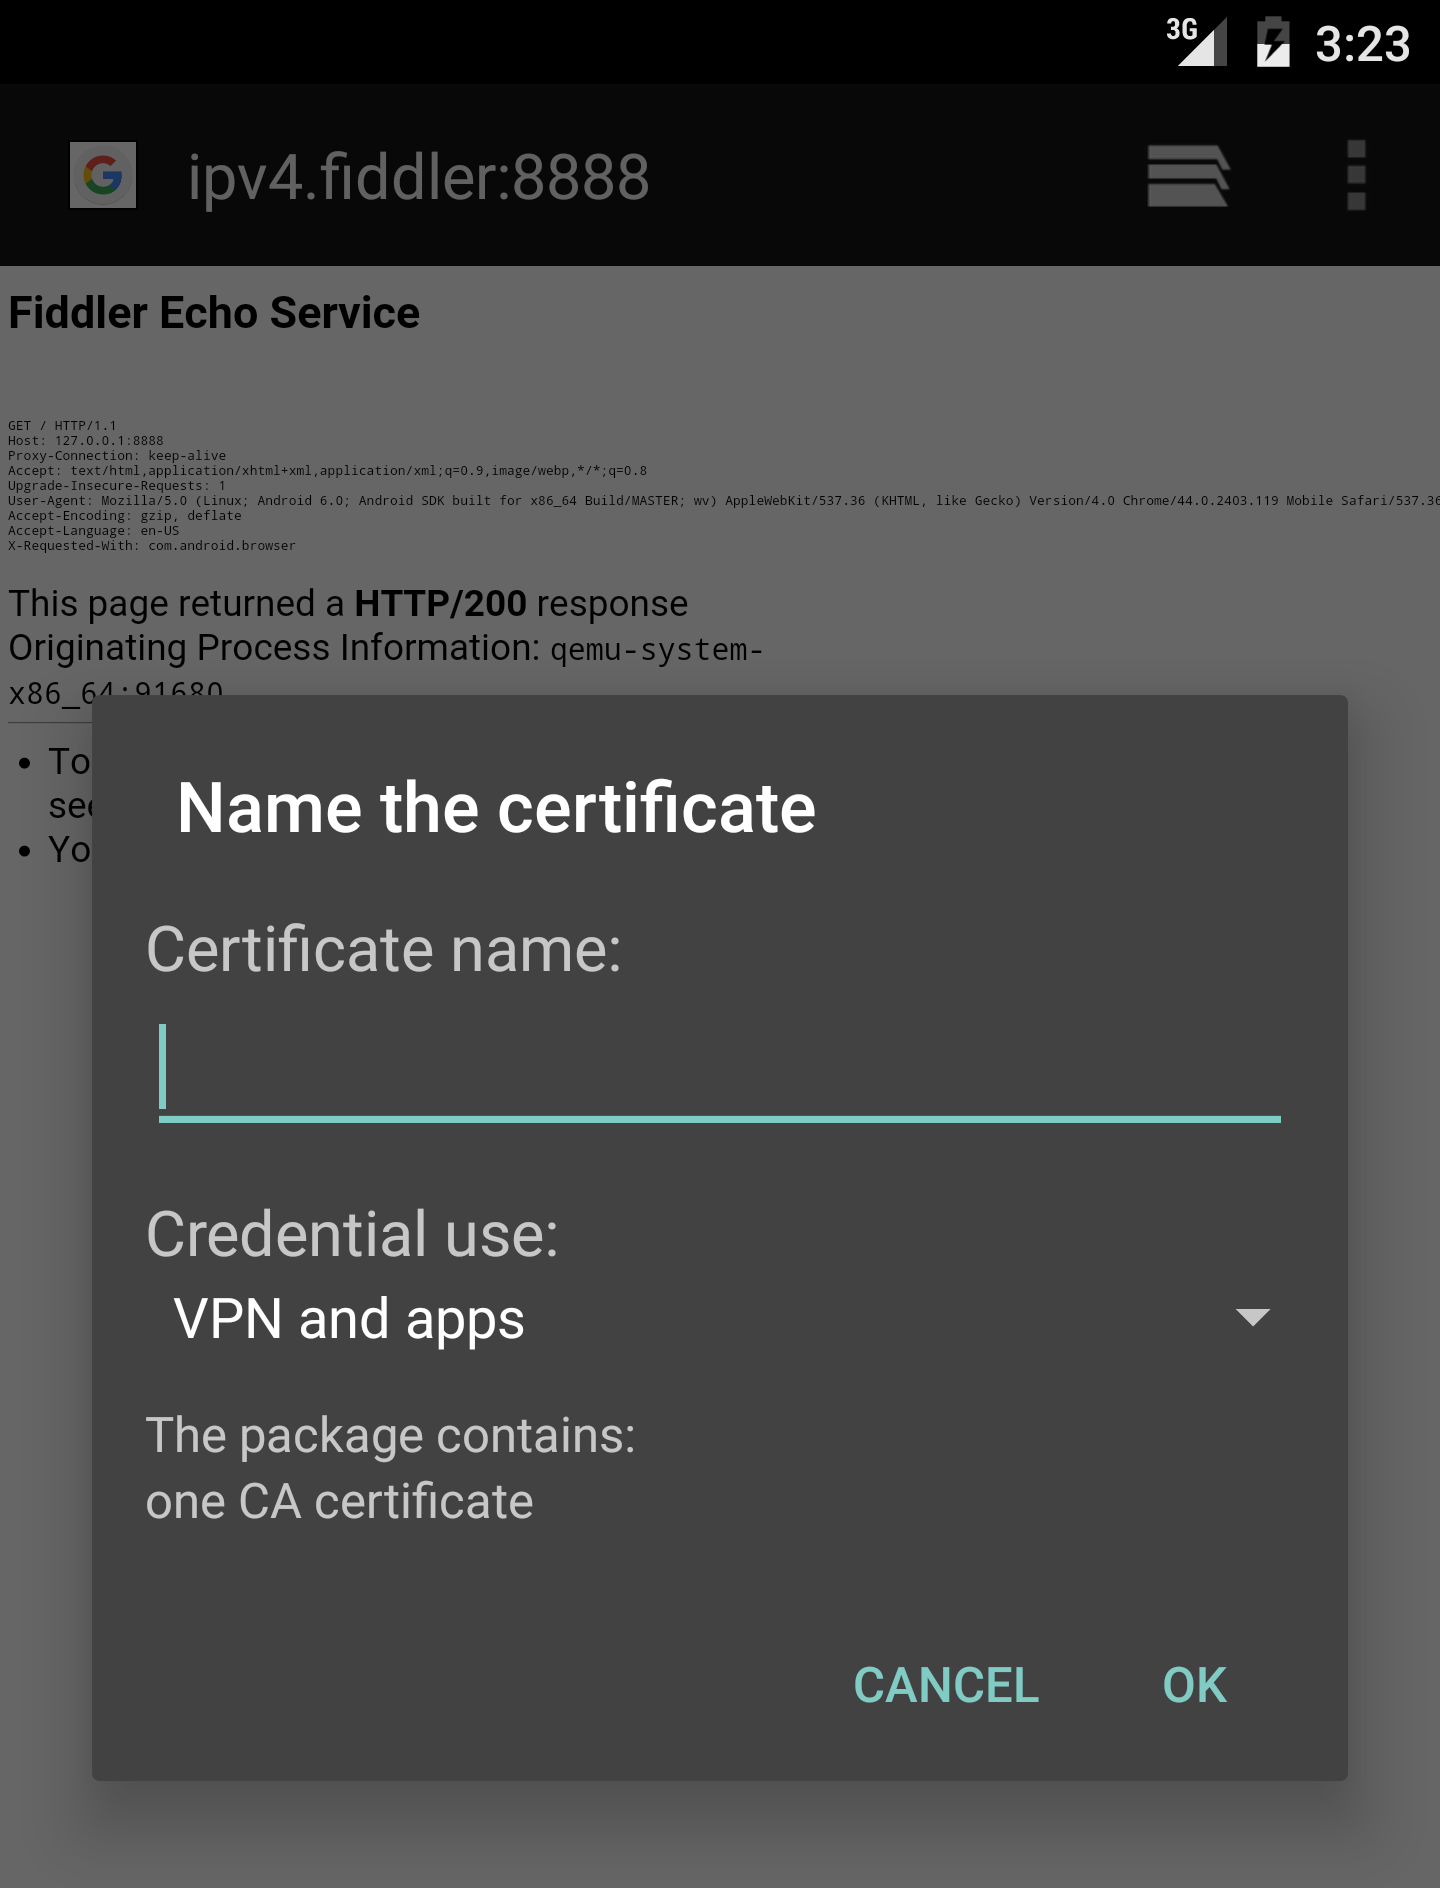
Type a name for the certificate. I recommend "Fiddler HTTPS". Make sure under "Credential use" that "VPN and apps" is the selected item. Press "OK".
-
Press the home button, then slide the notification area down, and tap/click on "Airplane Mode" to turn on Airplane mode.
Wait a few seconds, then tap/click it again to turn airplane mode off.
-
You should now be able to test your app and intercept information about HTTP requests in Fiddler.
Published: December 1st, 2016